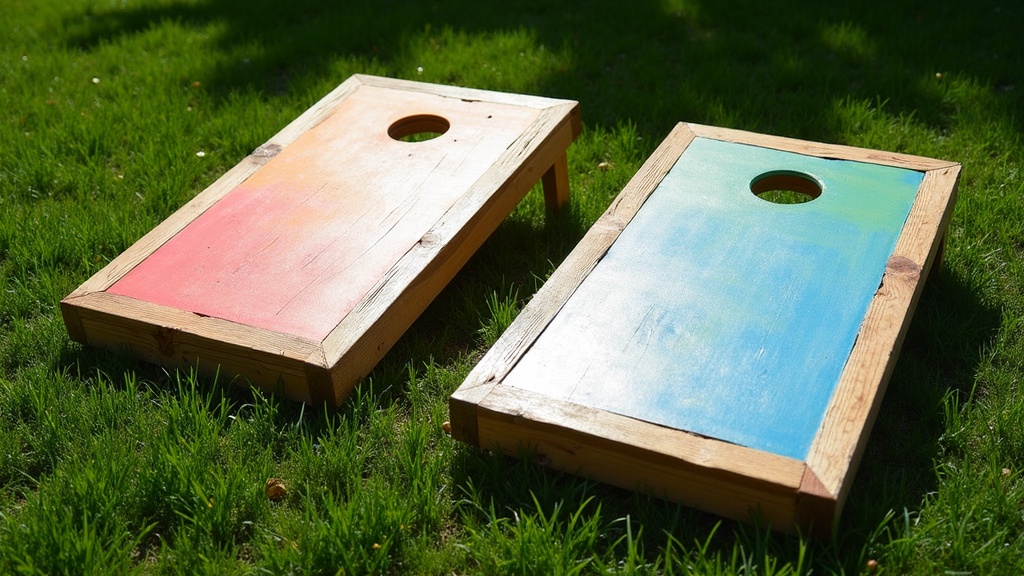
 DIY cornhole boards are one of those backyard projects that just about anyone can tackle, even without much woodworking experience. Building your own boards gives you the flexibility to pick your own colors, add custom decals, and make something that lasts for years of summer fun. Plus, making it yourself is a whole lot cheaper than buying a premade set.
I’ve built a few sets for friends and family over the years, so I know what works and what doesn’t. If you like working with your hands or just want a new project for the weekend, these DIY cornhole board plans will walk you through every step. By the time you finish, you’ll have a sturdy set that’s fully ready for your next barbecue or tailgate.
This guide covers how to pick the right materials, cut and assemble the boards, paint and seal them, and a few tricks that make the process smoother and more enjoyable. Ready to make your own set? Let’s get started and check out what you’ll need, plus how to put it all together.
Choosing Your Lumber and Supplies
The materials you use will affect how long your cornhole boards hold up and how they look in the backyard. I always suggest solid plywood for the playing surface and straight pine or fir for the frame because these woods are sturdy and generally affordable.
Shopping List:
- Two 2-foot by 4-foot pieces of 1/2-inch or 3/4-inch plywood (one for each board)
- Four 8-foot 2×4 boards for framing and legs
- Wood screws (1-1/4 inch and 2-1/2 inch sizes work well)
- Wood glue
- Sandpaper (80- and 120-grit)
- Exterior paint or stain
- Sealer (like polyurethane)
- Measuring tape, saw, drill, sander, and a hole saw (6-inch diameter)
Many hardware stores will cut the plywood for you if you don’t have a table saw at home, so just ask when you’re buying materials. For an official game set, be sure you’re getting boards that are exactly 24 by 48 inches to stick with the popular standard.
Measuring and Cutting Your Cornhole Boards
Careful and accurate measurements are critical to guarantee your boards meet the right size and feel level during play. The American Cornhole Association’s guidelines call for boards that are 24 inches wide, 48 inches long, about 12 inches high at the back, and 3-4 inches high at the front for the proper slope.
Steps for Accurate Cutting:
- Measure your plywood carefully to double-check it’s a true 24″ x 48″ rectangle. If it’s off by a little bit, your boards might not play evenly or fit together right.
- For the frame, cut your 2x4s into four pieces: two 48-inch lengths for the sides and two 21-inch pieces for the ends. Each frame will fit around the edge of the plywood sheet.
- Drill pilot holes for your screws; this step helps keep the wood from splitting and makes the assembly process easier.
To cut the bag hole, measure 9 inches from the top of the board down to the center point of the hole and 12 inches in from each side. If you have a 6-inch hole saw, that will get the job done quickly, but tracing a circle and using a jigsaw works too if needed.
Building and Assembling the Frames
Once your wood pieces are cut, it’s time to bring it all together. This is the point where your boards take shape and start to resemble the finished product.
Quick Assembly Guide:
- Begin with the frame; glue and screw your 2×4 pieces together, making a rectangle with the 21-inch pieces fitting inside the 48-inch side rails.
- Lay your plywood sheet on top and attach it to the frame with 1-1/4 inch wood screws, spaced about every 8 inches all the way around to keep things sturdy.
- Check that all surfaces are flush and the board feels solid. You want a flat playing surface with no wobble.
Using wood glue along the edges before you screw everything together adds a lot of strength and prevents those little squeaks and rattles during play. If you want your boards to last, don’t skip this step.
Making the Folding Legs
The legs let you store your boards easily and achieve the right playing angle. A simple folding leg on each end works perfectly. These legs screw in with a carriage bolt, so they can swing into position and tuck away for storage.
Leg Construction Tips:
- Cut four pieces of 2×4, each about 12 inches long for the legs. This length puts your boards at the correct height when assembled.
- Round off one end of each leg so it can swing freely without getting stuck. You can shape this with a jigsaw or sander.
- Drill a hole through both the frame and each leg for the carriage bolt, then attach so that the leg swings smoothly. Don’t overtighten; you want the legs to move but not be loose.
If you’re worried about squeaking or long-term wear, add a washer on each side of the leg. It’ll keep the motion smooth and make the boards last longer.
Sanding, Painting, and Sealing
Now that your boards are assembled, it’s time to get out the sander and smooth everything out. Skipping this step can mean splinters and rough edges, which isn’t fun for anyone. So, spend a little extra effort here and your boards will look and feel next-level cool.
Getting a Smooth, Durable Finish:
- Start with 80-grit sandpaper to tackle rough spots, then go over the boards again with 120-grit for smoothness. Don’t forget to round the holes and edges for better comfort and a professional touch.
- Apply a wood primer if you’re planning to paint, otherwise go straight to your choice of paint or stain.
- After the paint or stain dries, apply a generous coat of clear polyurethane. This protects your boards from weather, gives the surface the right amount of slide for the bags, and keeps your artwork looking sharp.
Always let each coat dry thoroughly before adding another. Most paints and finishes dry to the touch in a couple of hours, but check the label to be sure. Rushing can ruin your hard work and make the surface sticky.
Adding Your Personal Touch
Customizing your cornhole boards is your chance to show off some personality. Whether you like classic stripes, team logos, or backyard patterns, personalized artwork makes any set truly your own.
Paint Ideas to Try:
- Bold center stripes in two or three colors
- Your favorite sports team colors or mascot
- Fun backyard patterns such as flames, stars, or palm trees
- Removable vinyl decals if you want to mix in some variety later
Even simple touches like your family’s name or a big game date make the boards extra special. For additional durability, brush on another coat of clear sealer to protect your designs from the elements and heavy use.
Useful Maintenance Tips
Keeping your cornhole boards in top shape isn’t tough, but a little routine care goes a long way. After every game, brush off dirt or grass, and store the boards indoors if you can. Left outside in the rain, they’ll dry out much faster in a garage or porch; just make sure to let them air out completely.
- Check that the frame and playing surface stay solid every so often. Tighten up screws or add a touch of glue if you notice anything wobbly or loose.
- Give your paint and sealer a once-over at the start of each summer. If you spot wear or fading, apply a quick touch-up coat to keep things looking eye-catching.
With simple care, your DIY boards will deliver years of outdoor fun, tournaments, and family memories.
Common Questions & Quick Fixes
What if my boards wobble?
This usually happens when one of the legs doesn’t make firm contact with the ground. Try sanding the ends of the legs or add a felt pad to even things out.
Can I use thinner plywood?
Thinner plywood can make the board bounce too much or flex in the middle, which isn’t great for game play. Stick to at least 1/2-inch for decent results; 3/4-inch will be even sturdier and more professional.
Do I need to seal the underside?
I’d recommend it. Sealing the bottom helps protect against moisture, which causes warping over time. Even just a quick coat of spray polyurethane gets the job done well enough.
How do I store the boards during winter?
Try to keep the boards in a dry garage or storage shed. If you have to store them where space is tight, lean them upright and slip a soft towel between them so the playing surfaces don’t rub and get scratched.
Your Backyard Cornhole Board Checklist
- Pick up your plywood and lumber. Get them cut at the store if you don’t have the tools at home.
- Measure, cut, and assemble your frames and tops.
- Drill the bag holes and build your folding legs.
- Sand the boards thoroughly and customize with your preferred paint or decals.
- Apply two or more coats of sealer for lasting durability and weather resistance.
Once you’re done with these steps, all that’s left is to grab some beanbags and invite friends or neighbors for a game. If you have another pro tip or want to show off your own eye-catching cornhole board designs, feel free to share your ideas in the comments section below. Get outside and let the backyard games begin!
