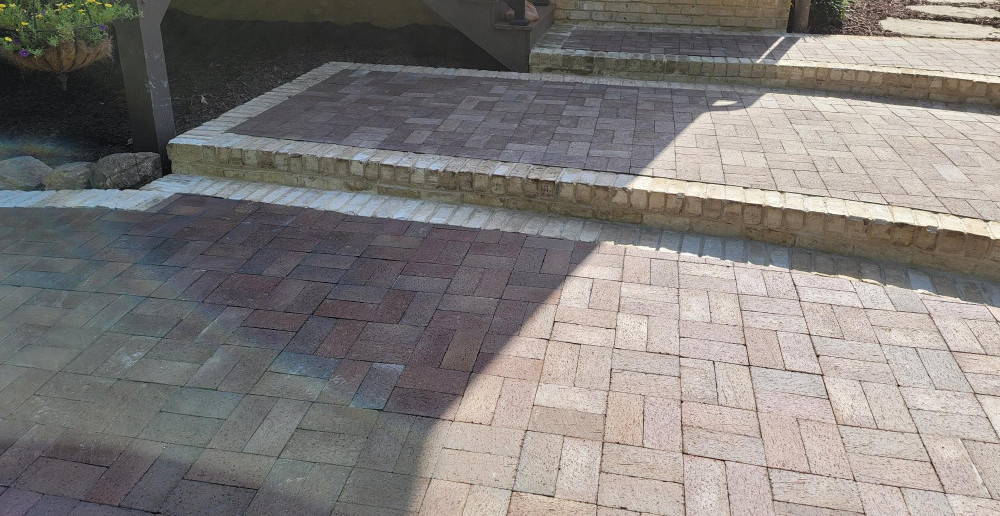
So, you have decided you have a boring backyard and want to spice it up a bit, or that you have unused space that looks awkward, and you want to help it flow better. Doing a patio can help add an extra living area or entertaining area to your home while also creating a better flow to your yard. Summertime means outdoor BBQs and cookouts, birthday parties and holiday parties. Having a hardscape patio in your backyard can help to designate the area you want to enjoy the great food and company of family and friends. An added bonus is the increase in value it can add to your home that you already love. I’ll be walking you step by step on how to create this space and be able to enjoy your hard work for years to come.
Designing your Patio:
In designing your patio there are a few things that you need to take into consideration before taking the step and actually building it. One thing you need to do is take a look at your backyard and see what kind of space you have to work with. Once you have an idea of where you would like to put the patio it is time to mark out your patio. You can do this with marking paint or stakes and string. When you stake out your patio, you need to make sure that your string line is at the finished height of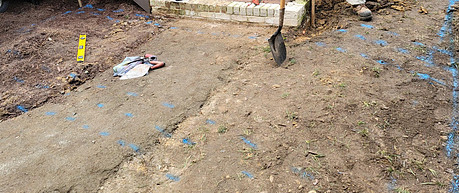 your patio. This will come into play later on when you’re starting to prepare your area to build your patio. With giving yourself an actual visual of the patio in its place, you can make sure that is where you want it and if the size you made is going to work in your space. You might notice you can go a lot bigger with it or that what you have marked out it is going to be way too big for your area. Seeing this you can now change the shape and size. Doing it now will save time and reduce headaches then if you had realized it after you have already started preparing the area or even have already finished the project.
Something else to take into consideration is the shape of your patio. Do you want it to flow with the house or with some already existing beds you have made. You don’t want something that doesn’t flow with your landscape. If you do that then it is going to look out of place and awkward in your backyard.
One last thing you need to look at while you have it painted out and just observing what it is going to look like finished. You need to see if it is going to function for what you are wanting to use it for. Maybe you have a lot of furniture you want to put on there, a grill and still want to have enough space for everyone to feel comfortable. You need to look at that and see if what you have designed is going to be functionable for your overall plan. Maybe you need to downsize some of your furniture and not put as much on there as you were hoping for, or it maybe you have plenty of space and not enough furniture to fill the space. It is something to look at while you’re in the designing phase of your build.
Materials and Equipment needed:
Now that you have the designing phase all figured out and you know exactly how you want your patio to look, it is time to start looking at different types of material for your patio. There are all kind of different pavers to bricks that you can use for your patio. I would go by a landscape supply store and take a look around at some different ones. Your local Lowe’s or Home Depot have different types to choose from as well.
To figure out how much material you’re going to need will be different for the different materials you will need. For your pavers you’re going to take the length x width of your marked out patio. I would order a little extra for when you’re ready to cut in your patio and need extra pavers to finish or for any mistakes that could happen. It’s always better to ensure you have more than enough of what you need than to realized you have too little. For the other material you’re going to need you will need to find the cubic yard, which is length x width x depth divide by 27, this will give you the amount you will need for the other material.
Equipment that you need to create your patio:
- Marking Paint
- Tape Measure
- Stakes (Wooden are best for leveling and setup)
- Masonry Leveling String
- Shovel, Spade type
- Wheelbarrow
- Hard Rake
- Level (3ft would be ideal, but it can be any depending on what you have or willing to get)
- String Level
- Tamper (hand or plate tamper – if wanting to rent)
- Grading rods
- Wooden 2×4(at least 4 foot long)
- Rubber Mallot
- Hammer or Small SledgeHammer (5lb)
- Chop saw or Masonry Saw (rent these items)
- Push Broom
- Water Hose with spray nozzle (be able to mist)
Material you will need to create your patio:
- Landscape fabric for pavers
- ABC rock (crush and run)
- Rock screening or Sand (both are great and either one can be used. It is your choice what you want to use)
- Pavers
- Beast Edging
- 10-inch spikes for beast edging
- Polymeric Sand
Step 1: Ordering your Material:
Before you start doing any digging or preparing your area to start installing your patio, you need to get all your material ordered or be able to pick it up if you have a truck and trailer. Remember, whatever material you chose is going to be very heavy and could end up needing a lot depending on the size of your patio. You’re going to need to do a little math during this part as this is where you need to find the area of your patio. If it is an odd, shaped patio then just measure out a square or rectangle and get the area of that space which will be a little bit more material but as said above, that’s ok. Once you know the area of your patio, you can now order your pavers that you have picked out with a little bit extra. Another item you’re going to need to get order or know how much you need is your ABC stone and rock screening. For this you’re going to need to know cubic yards and it isn’t that difficult to figure out, you just need to do length x width x depth divided by 27. Now know your cubic yards for your patio area you can get your material ordered and deliver.
Step 2: Preparing your area:
While you’re at the point it is time to start getting your area prepped and ready for your new patio. So, with the area that you have marked out and you’re going to start working in and around that area. One thing you might want to think about before you start this process is do you have any place to put extra dirt or do you need to have extra dirt brought in. So, what I am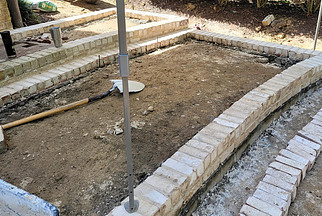 talking about is you need to now figure out how much base you need under your pavers. You want to have around 2 to 3 inches of ABC stone, an inch of rock screening and this is after it is tamped.
So, to prepare your area you’re going to need to know the width of your pavers and the thickness of your base material. You need to know all of this, so you know exactly how much material you’re going to need to remove or if you need to add extra material. It is going to be roughly around 5 to 6 inches you’re going to need to remove or have below your string line marking your patio finished height. This is where you’re going to notice if you need to remove dirt or add extra material. One thing that you must do before you do any digging is call in a utility locate. You don’t want to cut any important cables like your internet or tv. Now it is time to start digging out your base and getting it ready for the next step. But remember when you’re digging out your base you want to dig out about 6 inches outside of your marked patio. You’re doing this to help give your pavers a firm base that will not collapse on the edges later down the road. Plus, you will need a good base to put your beast edging into later on.
Step 3: Installing your base:
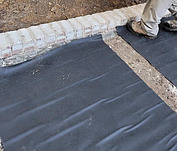
You now have your area dug out and ready to put down your base material for your patio. The first thing you’re going to want to do is lay down your fabric. You want to cover the whole area with this fabric that you’re going to be putting stone down on. I would hold the fabric down with sod stables or something similar to that, and you’re doing this to help prevent it from moving while you get the stone down.
Next you’re going to start dumping the ABC stone into the patio area. You want to put some down to cover the area until entire 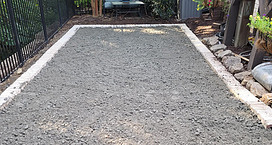 area and then rack it all out level. You’re going to now take your tamp and tamp down the entire area compacting the ABC stone down to make a firm foundation. You want to make this level as you can but with a slight pitch going away from your house. Use your level in many different spots and positions on your patio to make sure you have it level and also with a slight pitch away from your house. Take plenty of time doing this and make sure this is exactly how you want it. You might need to add some more ABC stone over the whole area or just in some place, but just remember that you don’t want to raise it too much you don’t have enough space for your rock screenings and your pavers. If your pavers are 2 and half inches thick, then you want and your rock screenings after compacted will be half an inch. You want your ABC stone to be right at 3 inches below your string line.
Now it is time for the last layer of your base. You’re going to need your screening rods and your wooden 2×4. You want to lay the screen rods down on top of the ABC stone and then pour the rock screenings down along the screen rods. But do not put the rock screenings anywhere that the rods are not. You want to do that because you want to make this section as smooth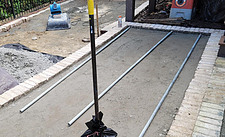 and level as possible. So, once you got it on spread out along the screening rods, you’re going to take the 2×4 and smooth out the rock along the rods. Once you reach the end of the rods, you’re going to move them down careful so you can repeat the process until you have covered your entire area of the patio. After you have your entire area covered and you have removed the screening rods. now you want to tamp down the rock screening. It needs to be a nice firm base that you don’t see your footprints while you walk around. You are not ready to start putting the pavers down on your patio.
Step 4: Laying the pavers:
Well, you are now to what can be the fun part and the part where you start to see your patio come together. You need your pavers at this time and with your pavers you need to have a pattern that they need to go down in. You can get this pattern from the landscape supply store you got them from or by looking the pavers you have and what patterns go with them. I would start in a corner along the house or the edge along the house. There really isn’t any certain place to start but it might be easier to be able to finish and everything out on the outer edges.
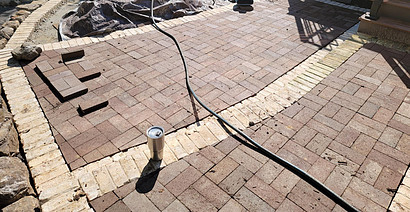
Once you have all the pavers down and the general shape of your patio laid out. You’re going to notice that some pavers are past your edge of the patio, and some don’t even come close to it. This is where you’re going to need your chop saw to be able to cut the pavers to match the patio edge line. You are going to need to use some extra pavers to help fill in these gaps. After you have cut in all the pavers to make your edges complete and now you can see the patio complete, it is time to move to finishing up the patio.
Step 5: Finishing the patio:
You are in the finally process of building your patio. You can now see what your patio is going to look like exactly. it is time to take the beast edging and put it on all the exposed edges of your patio that you can see the side of the pavers. You might have to cut some to make it fit all together. Once you got that down take the 10-inch spikes and you’re going to hammer them into the holes of the beast edging. You can do how many holes as you want. You can do one in every hole or skip some.
Your patio is basically finished now. There is only one more thing that you will need to do put down on your pavers that will fill the caps. This is where you will need the polymeric sand, push broom and the water hose with the spray nozzle. The polymeric sand you’re going to want to dump it down over the pavers. Take your push broom and just swipe the sand over the entire patio letting it fall between the caps between the pavers. You might need to add some more to make sure it has completely filled the caps. Another step that you can do is take a plate tamp with a plastic or soft material underneath and run it over the entire patio. This is going to help pack the polymeric sand down between the pavers and also pack the pavers into the base. Now you want to remove any sand from on top of the pavers before you wet them. Now you want to get your water hose with the spray nozzle on it. Turn it on to a mist setting and you want to lightly go over the pavers with the water. This is going to make the polymeric sand start to setup between the pavers that will hold them in and not let them move as much.
Conclusion
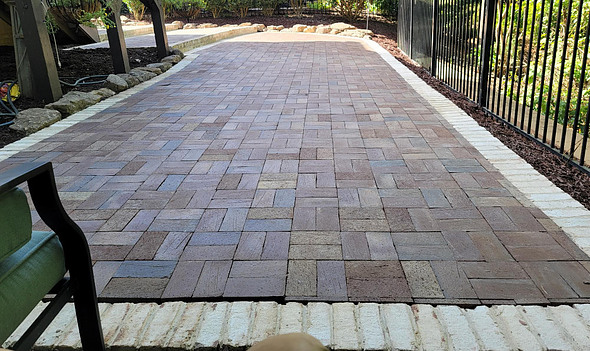
This has been a huge project for you to do but it is something that is going to be well worth it. Now that you have completed everything for your patio it is time to start putting your furniture back on to it. It is time to start enjoying the hard work you did to build your patio and enjoy it every day. Start planning some party’s with family and friends and show off your hard work that you did to complete your patio. You can even look into building an outdoor movie theater out there on your patio so you and your family can enjoy some great evenings out on it watching a movie together.
