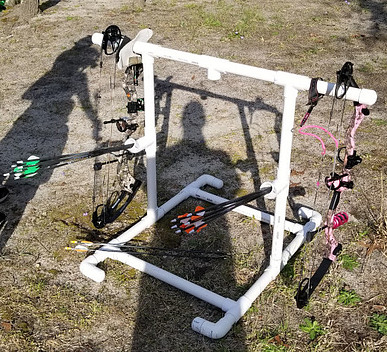
Something that I have always been into is shooting bow and target shooting with my bow. Recently, I have gotten my family into shooting and we love to do it on our spare time to be able to spend time with each other. I noticed when we were shooting we were always setting our bows on the ground or just back into our case. It was taking a lot of room and just getting very awkward to put the bows down in the case. I started looking around to what I could do to make things better for us and saw on Pinterest people building bow stands out of PVC pipe. I decide to do the same thing by taking different designs and made my own, which was built it in a weekend. Now we can hang our bows on it as we are shooting and taking turns. It is also good on the bows by not putting them in the dirt. Now I want share how I designed my bow stand and what it will take to make your own.
Designing your project
When designed your bow stand take into account being able to hold multiple bows for family, friends, and yourself. You can also make it hold your arrows while waiting to shoot or while your the one shooting so they can be kept out of the dirt and up for easy access while shooting. In this design a flat surface can be add to the top so you’re able to set drinks on or tools that might be needed while shooting. Planning different things like this into your design lets you add things at a later time and change it up if you decided to at some point.
Take the time to sit down and look at different designs to figure out how exactly you wanted the stand to look. Taking several different designs into consideration and draw out your own design. Doing this will help in the building process by knowing where all the pieces go and how the end product will look. Once, the design of the bow stand is drawn out, it will time to start figuring out the measurements for the different parts of the stand. Write the measurements down on your drawing for each piece of the stand, this will help you figure out what materials will be needed and how much material will be needed to complete the project.
Figuring out your material
After you have everything planned out and designed the bow stand, it is time to decide what materials your going to use for the project. Take into account that there is different thickness and diameters of pipes that can be used. So, you need to figure out what is going to be the best for your situation and get a PVC pipe diameter that will withstand everything.
When I built mine, I used 1 1/4 inch pipe so that it is sturdy enough to hold some weight and not collapse on itself. In my drawing I was able to tell how much pipe I needed and then how many different fittings, like 90s and tees, I needed.
Materials that I used are as followed:
- PVC pipe cleaner and glue (optional)
- Hacksaw for PVC pipe
- Tape Measure
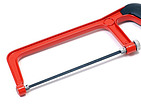
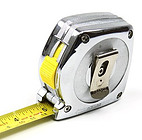
- Everything is for 2 inch pipe
- Fittings:
- Tees – 11
- 90 degree angles – 4
- End caps – 6
- 45 degree angles – 2
- PVC Pipe:
- 8 – 10 1/2 inches
- 4 – 14 inches
- 2 – 23 1/2 inches
- 4 – 4 inches
- 6 – 3 inches
Building your project
Now that you have your design, list of matrials and needed tools, it is time to go and get them so you can actually build it. After getting everything to build the bow stand, it is time to cut the PVC pipe to the correct lengths for each section of the stand. Once the pieces are cut, your ready to put together the bow stand. Use your drawing to start laying the piecing in the correct place and put it together. Although you can buy the cleaner and glue for PVP pipe, you might decided not to use it on your project because everything will hold together just fine without it. Without gluing it you can make it to where the feet of the stand are able to be folded inward for storage and easier to travel with when you go to ranges or friends houses. With not glueing everything together, I can also take it apart to keep adding different features at a later time. But you can glue some sections or all of it if that is what you decide to do. This is your project and your building it how you want it built.
Assembley of the Stand
So with your drawing start by making the base of the stand. Take 4 of the end caps and 4 of the 3 inch pieces. Fit these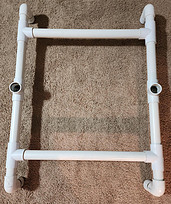 together and then get the 4 – 90 degree pieces and put them on the other end of the 3 inch section. The feet have just been made and now your going to attach them to the base. To make the base your going to need 6 – Ts, the 23 1/2 inche pieces, 4 – 10 1/2 inch pieces, and the 4 inch pieces. Take the 23 1/2 inch piece and put 2 Ts on it using the middle section of the T. On the ends of the T you want to put a 4 inch piece and a 10 1/2 inch piece. Do this on both Ts so that both 4 inch pieces are on the same side and the 10 1/2 inch pieces are on the same side. You’re going to do this one more time and have 2 similar pieces. But you’re going to make sure when you put them together that the 10 1/2 inch pieces match up with each other. You will take 2 Ts and join the 2 pieces together having the middle section of the Ts pointing upwards. The 4 Ts at the ends you can attach the feet you already made.
Now you’re going to build the stand going upward. You will need 2 of the 14 inch pieces, 2 Ts, and 2 – 10 1/2 inch pieces and you will be attaching these together to make one side. Take the 2 – 14 inch pieces and attach them to with a T using the ends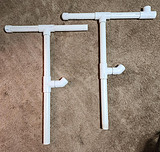 of the T. and then at the top of this piece add another T using the middle section. Now with the top T attach the 2 – 10 1/2 inch pieces. Your piece is going to look like a big T now. Your going to do this all over again making the other upward piece of your stand. Now you have 2 big Ts pieces and your going to attach them togething using a T with the middle section pointing upwards. On the other ends attach 2 of the end caps. The Ts on the middle portion of this section your going to add the 3 inch piece to the middle portion of the T and then on the other end of the 3 inch piece add the 45 degree piece.
All you have to do now is add the two sections you have made together. So take the base and the top section and put them together using the Ts that are pointed upward in the middle of the base. You can now leave it the white PVC color or paint it any color you want to finish your project.
Conclusion
With the bow stand together, it is time to start using it to hold the bows and enjoy a great time with family and friends. Shooting bows is something we do to spend time with each other, hone our skills, and build strength. I also no longer have to worry about my little boys just putting their bows in the dirt and messing something up. I know they are going to hang there bow on the stand and put their arrows in the spot for them. This project was a simple easy build for a weekend. I hope you enjoyed my post and if you have any quetions, feel free to leave a comment and I’ll respond back as soon as I am able to.
