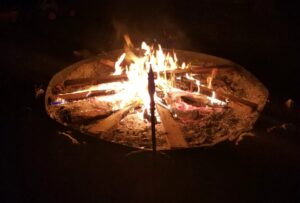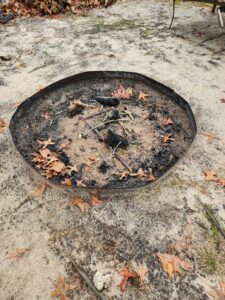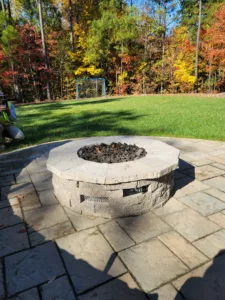
A fire pit is something that brings people together for an evening of fun, laughter, and relaxation. A family can come together by a fire pit to cook dinner, to make a very tasteful dessert, or to just relax and be together. A fire pit can have many different uses for it more than what some people might think. It can be used to get rid of branches from around your yard, to burn the extra paperwork and mail that you have laying around your house that you just don’t want to throw away or have time to shred. In this article I am going to walk you through on how to build you a fire pit in your backyard and the simple way to maintain it for years to come.
The tools and material needed…
The tools needed for this can be from just a couple to having to rent some. It is all going to depend on how expensive and in-depth you want to go with your fire pit. One thing you want to take into consideration is how big you want to make your fire pit as that will also affect the number of materials you need. Here is a list of tools and material that can be used to make your fire pit.
Tools that are needed:
- Shovel
- Hammer or rubber mallet
- Level
With that list of tools, you can build you a very nice fire pit, however, you need more than just tools to get started. Picking out the material you want to use around your fire pit is another important part of how expensive you want to go with your pit. It can be done many different ways and use many different combinations to make your pit.
Material that can be used:
- Metal Landscaping edge (4ft long)
- Rocks from around the area or bought from your local nursery
- Wall pavers (size depends on which one you pick)
- Bricks (on average 8in x 4in)
- Decorative rock (lava rocks, landscape rocks, but never use river rocks)
- Sand (all-purpose)
You can take just one of these materials to make your pit or combine many of them to design and make your pit. The design and material are all up to you and how expensive you want to go with this. Remember to never use river rock for a fire pit because they can crack and/or explode under the high heat that comes with a fire pit.
Finding the perfect spot for your fire pit
A pit can go in many different parts of your yard or property. You might alright have one and just wanting to update your existing one, or someone that doesn’t have one and you’re wanting to build your first pit in your backyard. The location should be the number one thing you think about when designing your fire pit. You want it to be the center piece of your backyard, or just be another area you have to entertain your family and friends.
Depending on your decision of where you put your fire pit, you want to look for a nice level spot. A spot away from any low hanging branches from any trees in your yard. You also want to keep it far enough way from the house and any place your kids might be playing. Safety is a huge thing to think about when making a fire pit. Putting it in a spot that isn’t going to obstruct the backyard from things your already doing it. That could mean playing any type of sport in your backyard or just keeping the aesthetics of you yard.
Building the fire pit
Now that you have the tools, materials, and the right spot it is time to start building your pit. Depending on how extensive you have decided to go with your pit is going to depend on how much time you will need to devote to building your pit. The steps to building the pit all start off the same way but can have a lot more steps depending on how much you want to put into your fire pit.
Metal Edging/Rock Edging Fire Pit:
- Always make sure before you dig you know the area and not digging on any buried cables, gas line, and power line.
- Clear out the area from any grass and debris in the area you’re going to build the pit.

- Dig out the area the desired diameter of the fire pit to at least 3 inches deep.
- Take your edging and bend it so it will make a circle and put the pieces together.
- Place the edging on the outside diameter of what you dug out.
- Now at this point you can be complete, or you may want to decorate it up some and hide the edging.
- Find some large rocks from around the area or the ones bought from your local nursery to line and hide the outside of the metal edging. Small boulders are also great to add around the metal edging.
- Take a decorative smaller rock like lava rocks, or landscape rocks to make a border around the inside of the pit about 6 inches to 1 foot all the way around.
- Set up your logs in the very center and enjoy your new fire pit.
Paver/Brick Fire Pit:

- Always make sure before you dig you know the area and not digging on any buried cables, gas line, and power line.
- Clear out the area from any grass and debri where the fire pit is going.
- Dig out the area the desired diameter of the fire pit to at least 6 inches deep
- Add sand to the bottom edge of the pit the width of your pavers or bricks about 2 inches thick.
- Level the sand out as this will become the base of your pavers.
- Start off with this first layer of pavers and make sure they are completely level with each other. Use your mallet and level to get them level with each other.
- Leave a couple small gaps, about 1 to 2 inches, to allow for airflow which will help keep your fire burning.
- Once the first layer is level then you can start building up to the desired height for your pit. Place the next layers of pavers close as you normally would without any gaps.
- Once you’re at your desired height you can either stop here or there is the option of putting a cap onto your pavers.
Now that you have completed your pit is time to start using it and getting many years out of it. It is time to enjoy what you have just built with your own hands.
How to keep your fire pit lasting for years
You will notice after many uses of your fire pit it is going to start building up with ash and burnt pieces of wood. If you don’t do anything it is going to keep building up and soon close off your vents that you built into your pit. For this, you are just going to take a shovel and bucket to scoop out the ash. Doing this at least once a year will help make sure your fire burns great and you can get many uses out of it.
Conclusion
As you can see, this is an easy project that one can plan and complete in a weekend that can be a great entertaining piece for your back yard for years to come. If you have any questions or concerns about anything and need to reach out to me, please feel free to leave me a comment and I will get back to you as soon as I can.
