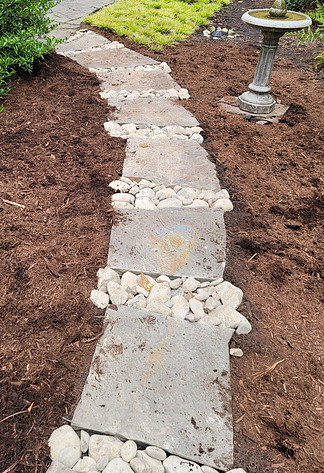
 First impressions are everything, to include your home. When you want to set yourself apart from you neighbors, adding curb appeal can really help. Putting in a walkway through your yard, added from your driveway to your front door or even just to get to your back yard without walking through your grass can add value, curb appeal, and help set your home apart from those around you.
Designing your walkway
When you take into consideration the designing of your walkway, you need to figure out where you want it to start and end, what shape you want it to take, just a straight line or curvious. Once you figure out location and shape of your walkway, then you need to take some marking paint and mark out your path. If marking paint doesn’t work that great for you to get a visual of your walkway, then you can also use stakes and string. By doing this you can actually get a visual of how the walk will look once it is finished. I would mark it out and walk it and take a day or two looking at it and make sure that is how you want it to look and that it flows with any landscaping you may already have. If this is your first item your doing to your landscaping before anything else then I would make sure it flows with your house.
Some things that you need to make sure you take into condsideration when your making your walking is that you need to call 811 first and have your ulities located. Some of your ulities are not buried very deep and when your digging out your walkway you could hit or damage a ulitity causing your project cost to raise considerable. With them marked, you can also plan accordingly to how you put your path down depending on your material you choose to use. Another thing to look at while your marking the walkway out, is if you have any huge trees right next to the walkway or close by. With the trees comes large roots that might make digging out the walk a lot harder or impossible to do. Trees could, over time break or shift your walkway making it harder to walk on and less visually appeasing. With taking these things into consideration while your planning your walkway out, it will help with less headaches down the road with building and maintaining your walkway.
Choosing your material and equipment needed
Now that you have your walkway marked out and decided exactly where you want to put it, and having a few days of looking at it to make sure that is where you want it and how you want it to look, it’s time to go and check out different types of material to use for your project. There are many different places you can go to and look at material, such as Lowe’s, Home Depot, landscape supply store, and even online. I don’t recommend doing it online because you can’t really buy a piece to bring it back and see how it looks with your home and yard, which I recommend you doing so you can see what matreial looks best before just buying everything you need to finish the walkway and end up not liking it after you get it down. While it may take a little more time, it helps to have full visuals of how a stone or brick might look before hand.
Some of the different types of material you can choose are flag stone, pavers, stepping blocks, and even brick to name a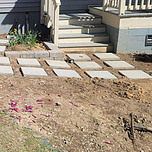 few. With each of these comes different tools and ways that they can be put down. Some can be down pretty much the same way no matter what materail you choose. If your doing this on a budget and dont have a ton to spend on the project, finding something that doesn’t take a lot of prep work and materail might be the better option for you.
The type of material you choose for your walkway can determine the equipment you will need to complete your project. I will give a good list of the equipment you will need for any type of walkway you may choose to put down. Some of the items might be needed for every type while others might just be for more intense walkways.
Tools needed (again, not all of these are for every type of walkway)
- Marking paint
- Stake and string
- Mallet
- Hammer
- Tape Measure
- Shovel
- Hard Rake
- Wheelbarrow
- Hand Tamp
- Inch thick screen rods
- 2×4 board
- Masonary trowel
- Level
- Chop saw for masonary stone
Material needed (some of this can be used for every type or not depending on how you want to do your walkway):
- Paver fabric
- ABC / crush and run
- Sand or rock screening (it might be called something different at your store which an employee should be able to help you with)
- Mortar type S (or if you prefer a different type, use what your comfortable with)
- Polymeric Sand (for the joins after it is complete)
- Beast edging
- 10 inch nails for the edging
Preparing your walkway
This is going to be the brunt of the work on your walkway. Getting the area prepped and ready for the materail you choose will help make things go smoother when you’re ready to install your walkway. With your walk way marked out and you have your material picked out it is time to start digging it out. I would do one step before you start digging. This will help to mark out the final height of you walkway. You are going to need stakes and string and mark out the height for the remainer of the walkway. This will help you to know exactly how much dirt you need to remove or add for your walkway material and the base for your walkway. You will also need to dig a little extra out along each edge of your walkway to be able to fit the beast edging in. This edging needs to be just slighty below grade of your final walkway so it is not seen after the walkway is finished. This can go a couple different ways which I will explain in the next few paragraphs.
Without a base: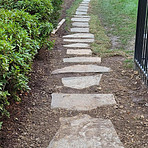
- This way your going figure out how much space you have betwen your string line and the dirt all along your walkway. All your going to figure out here is the thickness of your walkway material to the string line you put in place (final height of your walkway). Then there might be spots you need to dig dirt out to fit your materail and then there might be spots you need to add materail to raise your matreial to your final height. If you’re doing just flag stone or small individual steppers, I would just lay them down where you want them to go and dig or add dirt under them along the walkway. However, if your doing a walkway that they are all pretty much touch you might have to dig the whole area out or add depending on the dept of the walkway. Once you have this complete, it will be time to install your walkway.
With a base:
- With your string line in place for the final height of your walkway, you need to now do a little math and figuring out how much dirt you need to remove from your walkway. Don’t worry the math isnt going to be that hard to do. You will need to know the thickness of your walkway material. Once you have that, you’re going to add about 2 inches of ABC rock and an inch of sand/granite screening. So lets say your materail is 2 inches thick and you need 2 inches of ABC and 1 inch of granite screen, your overall depth from the string needs to be 5 inches down. Now if you go a little bit more or a little bit less then the 5 inches that is ok. You can just add or substract some of the ABC from the walkway, but the granite screenings need to stay right around 1 inch thick.
- With a mortor base you do it pretty much the same way as above but yo’re use a different type of base. Instead of using ABC, you just the granite screenings and mortar. If your going to do it this way you won’t have to dig as much dirt out and use a little bit more granite screening then the previous way. You will now be using mortar underneath the walkway to set your materail. I would try and make it where your using about an inch of mortar underneath your material. If you go more then that your going to be using a lot of mortar and that can get expensive and an inch is plenty to set your walkway in.
- Another way that you can have a base under your walkway is just by using mortar. which is used often when using flagstone rock. All you have to do is sit the flagstone down along your walkway where you want them and dig out the area enough for about an inch or so of mortar. I wouldn’t dig to much out so you don’t have to use a lt of mortar under each rock.
These are just a few different ways to prepare your walkway. Once you have figured out which baseline is best for your project, it is time to start installing all the material and your walkway.
Installing your walkway
Most of the hard stuff has already been done and now it is time to start putting everything together and finish your walkway. So now it is going to depend on how you prepared your walkway to how your going to start installing everything. There are different steps your going to take if your prepared without a base or one with a base. But one thing to keep in mind that no matter if you have a base or not that you need to layout the steppers you plan to mortar down to make sure you dont set them to far apart from each other.
Without a base:
- If you’re not using a base, then your walkway is going to be pretty simple from this point on. All you need to do now is set your material back down into their spots and make sure they’re level. Once you have done that, take some of the extra dirt you have and pack it back around the steppers so they are firmly in place and don’t move as they get walked on.
With a base:
- If your using pavers or a material that is going to be close with little to no gap inbetween, then a full base underneath is the ideal way to go. You’re going to start with laying fabric down all along the walkway and place ABC stone down on top of the fabrice. You want your ABC gt be at around 2 inches thick all along the pathway.
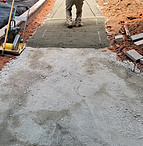 You want to have about 3 inches from the top of the ABC stone to the string line. You take this mesaurement after you tamp the ABC stone down. Once you have completed this step, it is time to add the granite screenings. You only want to add 1 inch of screening to the walkway, which needs to be leveled out using screening rods and a 2×4 to get esure the correct thickness. After you get the granite screening down and leveled out, you will need to tamp it down. Now that you have laid the fabric, ABC, and granite properly, it is time to start laying down your walkway material. After you get the walkway down it will be time to cut the materail to match the size of walkway you want and to piece in missing pieces. You can see in the picture below there are pieces that go beyond my flag line. Those are what you are cutting and placing in where they fit for each empty spot. Piecing everything in is one of the last steps your going to be doing. Adding the beast
 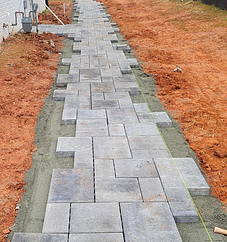 edging along the walkway will help hold the material in place and not let it move later down the line. The last step your going to do is add polymeric sand to the material to fill in the joints of the pavers or rock that you decided to use.
 - Another way that can be done to install your walk is pretty much the same process as the one above. But instead of the different levels of rock materail you can just add one of them. Either the ABC stone or the granite screening. You will still need to tamp them down and firm up the walkway. After you get everything tamped down it will be time to add the beast edging to the width of the walkway you want it to be at finish. This is a good process to use when you’re using flagstone or smaller flat rocks that won’t need much cutting. With the flagstone you can take a masonary hammer and break the rock to different sizes that will fit into your walkway. When you’re placing your stone down on the walkway remember that you can have them close or with some gap between them. Once you got the rocks in place and how you want them it will be time to add the mortar underneath the rock. You want to add just about an inch but enough to get it level with your string that you have already sit in place. So after the mortar has sat and things are in place it will be time to add the polymeric sand between the gaps.
- Another way you can put your walkway down is just with mortar under your stone. This way is pretty much just like doing it without a base but your digging a little bit more so you can add mortar underneath your stone. Doing it this way you can leave enough space for grass to grow between or have to close enough that not much could grow between. Just make sure if your going to leave space between them that you walk them before finally sitting them to make sure they aren’t to far apart for each step.
Conclusion
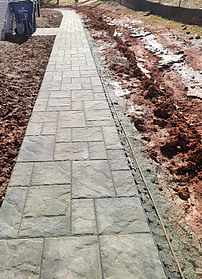
I know this is a lot of work and depending on what type of walkway material you choose it could be more extensive than others. But it is something that anyone out there can do in a weekend or 2 depending on how long and extensive you want to make your walkway. Just remember, this is something that can set your house apart from others and help with the functionality to get around your house. Something else that you can now look into is adding landscaping lighting to your path that you have just finished. I am going to go into how to install different types of landscaping lighting in another article. Keep an eye out for that and this will be something that you can add to your landscape. I am always around for any questions or concerns that you might have with building your walkway through your landscape, leave a comment and I will reply back to you as soon as possible.
