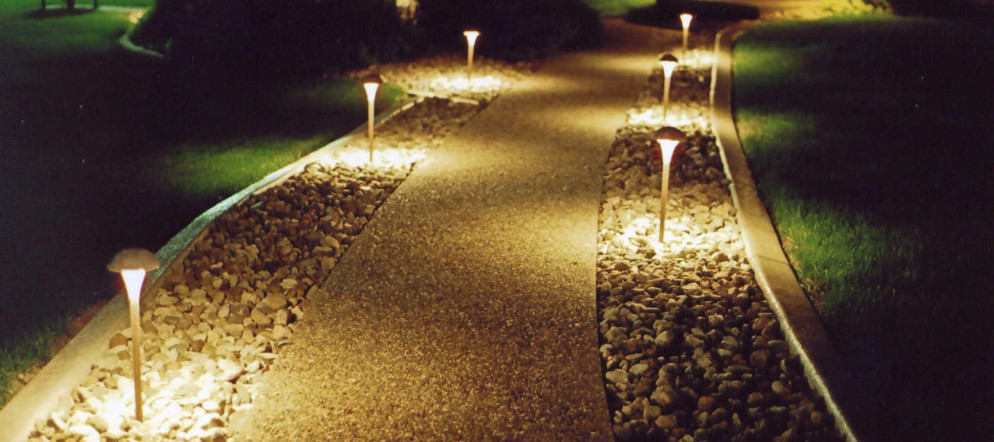
 Have you been driving through your neighborhood and seen that house that has the nice lights throughout their yard that is marking different aspects of their landscape. As you see that house, you’re wondering how can I get those lights around my yard. Well the instillation it isn’t very complicated at all and could take you only a weekend to install everything yourself.
Different types of Landscape Lighting
There are different types of lights you can use throughout your yard. Some that are just for paths you have on your property and some are just to shine up pointing out different features. Then you could have some that are just for steps or deck lights that are just for deck posts. There are many types that you can pretty much put anywhere on your property to light something up to show it off during the night.
Items Needed to Install the Lighting
There isn’t really much you will need to install landscaping lighting. It is a very simple thing to do and requires very little tools and items to install everything. It can also depend on if you’re doing wired lights to just solar lights. There are many places to find your lights and the items needed to install the lights. Some places can be Lowes, Home Depot, Landscaping Supply stores, and even Amazon. Just have to shop around to find what kind you’re wanting to get.
- Solar lights
- Wired lights
- Lights
- Transformer
- Wire (low voltage 10-2)
- Wire Nuts
- Wire stripper
- Sod Staples
- Screw driver
- Item to make a hole in the dirt (a stake, pole, or anything can work)
- Hammer
Now that you have the items you need to install the different type of lights. It is time to figure out what type of lights you want to go with for your yard. With that figured out you need to now walk around your yard and decide where all you want your lights. Do you want them to shine on your pathways or on your house. Do you want them to shine on different trees throughout your yard and on your deck. There are many places you can shine the lights. You need to walk around and decide where you want them, so you can go and get the different lights.
Installing the Landscaping Lights
Now it is time to start installing the lights you have picked out. Installing them is going to depend on which type of lights you decided to go with. Placing them will be the same for either type but the steps afterwards are different. So we will talk about installing the two different types. Take your lights and you want to place them in the areas you have decided to put them.
Solar Lights
- Take the stake and hammer and make a spot in the ground where you want to put the light. It needs to be deep enough to get the spike of the light into the ground completely. Also remember to put the light in a spot that it is going to shine where you want. Meaning not to close or far away from the figure you want to highlight with the light.
- Get the light out of the box and put it together. Which is usually just putting the light in there and putting the spike on the light. There might be some other parts to put on just have to look at the directions.
- Then your going to just put the light in the hole you already made.
- Then move onto the next one and repeat the steps.
- This type of light is extremely easy to install and put around
Wired Lights
- Take the stake and hammer and make a spot in the ground where you want to put the light. It needs to be deep enough to get the spike of the light into the ground completely. Also remember to put the light in a spot that it is going to shine where you want. Meaning not to close or far away from the figure you want to highlight with the light.
- Remove the items from the box and put the light together. You might have to put the bulb in the light fixture. Put the spike on the bottom of the light and there might be some other parts that need to be put on. Just follow the directions for the light to put it together.
- Your going to take the transformer and find a place on your house that you can mount it. It also needs to be by an outdoor plug.
- Your going to take your wire and run it to all your lights. Depending how far the lights are from the transformer is how many you can have on that one wire. You might need to run multiple wires to get all the lights wired up that you have placed in and around your yard.
- When wiring up the lights make sure you wire each one up the same way. This way it will be easier to put the wires in the transformer and lights will work.
- When you run the wire to each light make sure to leave plenty of extra wire for future use where you can move the light some in any direction.
- Take the wire strippers and strip the wire to connect light to the wire you just ran from the transformer. Then your going to take the wire nuts and put over the exposed wire. Your going to do this for each light you have in your yard.
- After you have run the wire to each light and hooked up all the lights you want to take the sod staples and pin down the wire so it does not get moved around or hit by anything.
- Some tips to take into consideration when running the wire and lights in your yard.
- Run the wire in areas that will not be hit by any weed eaters or edgers.
- Run the wire where it is not going to be over taken by any roots.
- If your going to be crossing any walkways or driveways, the best thing to do is to have a sleeve (PVC pipe to run the wire in) under the area so it can be installed or removed without tearing up the walkway or driveway.
- Want to run the wire places that is not going to be seen and easily hidden.
Time to turn them on
Now you have everything hooked up, ran and covered the wire up, so you can’t tell there is anything going through your beds for the lights. Now it is time to turn them on or let them come on at night. This is when you need to make a time to go out and check them out to make sure they are pointing in the direction you want them and if you like where you have placed them. You can make adjustments now because when you’re installing them it is day time and you don’t know exactly where they are going to be pointing. So once you have all that done it is time to enjoy your project for the nights to come.


