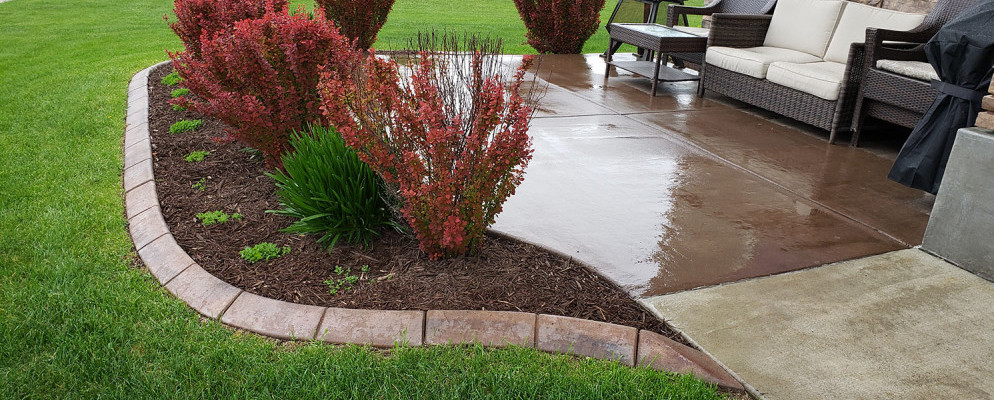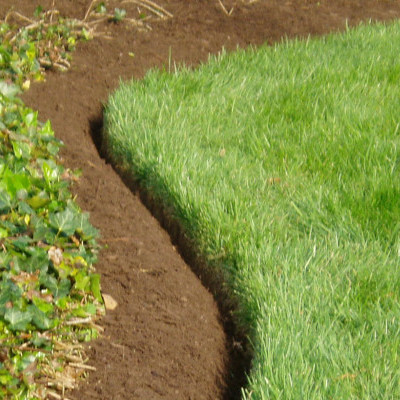
Having a beautiful yard is something most of feel is important on how our overall house looks. One thing that helps our yards stand apart from others is how our landscaping is done. Part of the landscaping that can help bring out the beauty of not just your yard but the beds that you plant is edging. There are many uses for landscape edging. Edging can be used to mark your beds throughout your yard, line the border of your grass, or the edging of certain areas in your yard such as a patio or playground area for you children.
Different Types of edging:
There are many different types of edging you can use for your yard. The edging ranges from some very inexpensive pieces to some that will cost a lot to buy and have them installed. The edging can be anything from metal edging, wood edging, rock edging, to pavers. It can be anything you want to use that will set one area apart from another. Many different types of edging are as followed:
- Metal edging
- Rubber edging
- Cedar plank edging
- Treated Lumber
- Belgian Blocks
- Bricks
- Pavers
- Concrete
These are some of the most common types of edging that you can choose from to line the areas you want to use the edging on. But the ones that I have listed are not the only things that can be used for the edging. So if you have something else in mind that you want to use for your edging then use that and make it work for your space.
Tools needed to install your edging:
The tools that you will need is going to determine which type of edging you go with for your space. Some of the tools will be the same and other types will call for more tools then other. So, you will want to take this into consideration when deciding your edging. If you’re working on a budget and need something done quickly then choosing an edging that needs more tools is also going to take more time to complete. The tools needed for any type of edging are going to be:
- Marking paint (flags or rope)
- Shovel
- Wheelbarrow
- Hammer (but the type will vary depending on the edging you choose)
- Level
Some of the tools that can vary depending on the type of edging you choose can be:
- Masonry tools
- Concrete mixer
- Concrete forms
- Drill
- Saw (handsaw or circular saw or any type that can be used to cut the wood)
- Angle grinder
These are the main ones you will need to install many different types of edging that are out there for you to choose from. These are not the only tools you might need, but it is a good start of everything you could use to install your edging.

How to install the edging:
Installing the edging can have some of the same steps no matter what edging you choose and then some of the steps can be different. The first part of the process is the same no matter which edging you choose. The process is going to be as followed:
- Choose what type of edging you want to use.
- Deciding where you want to put the edging.
- Drawing out with marking paint, flags, or ropes the shapes of the areas you want the edging.
The next step is where things will get different depending on the edging you choose.
- Depending on the edging you might need to remove some dirt and dig a small trench for the edging and mortar to be able to sit down into. This would be for edging like bricks, Belgian blocks, pavers and/or concrete.
- So, if you’re using an edging that needs mortar make sure you factor in the depth that you need to take out for the edging to sit at the desired height and at least 2 inches of mortar.
- If you’re just using an edging that you’re not sitting into mortar, then you will just need to take enough dirt to have the edging sit at the desired height.
- Digging a small trench to get certain edging level all across the area might be the only thing you need to do. This would be for edging like metal edging, wood timber, cedar plank edging, and even pavers, Belgian blocks, bricks if you just use them without mortar.
- Once you have the areas dug out then it is time to start installing the edging.
- Some edging like metal edging your will just need to hammer the spikes into ground.
- Rubber edging you will just need to make sure that you hammer the strip down and the bottom edge will hold it in the ground.
- If you’re going to use edging without mortar, then at this time you will take whatever edging you chose and lay them out and make sure they are level with each other. If you’re not wanting them level, then just laying them down and make sure they have a good base to sit on is all you will have to do.
- Using edging with mortar this is where you’re going to make mortar and lay your edging down into the mortar and make sure they are level and sited into the mortar enough to hold them.
- You can also use mortar and laying brick in the same area. This process can be very time consuming but in the long run serves different purposes.
Pros and Cons for having edging:
- Pros
Having edging for your beds can help out a lot with maintenance in your yard and helps with the overall look of your yard. Edging can be used to help keep the mulch in your beds and out of any other areas it isn’t supposed to be. With certain types of edging, it can even keep grass out of the beds. Some of the cheaper options, such as metal, rubber, and plank edging, can be very easy to install and not take long to get them all in place, while other might take a while to install but at the end it will look a lot better and make your house stand out compared to others.
- Cons
Doing edging around your beds can be a very expensive and time-consuming project. If you go with some of the cheaper methods, then you might be replacing the edging more often. With some of the different types it can be hard to maintain around and keep grass from growing between where it is hard to weed eat around them. There might be some others that after some time the pieces will rot or fall off and make the edging useless or unappealing to look at.
Conclusion
So, with knowing all of this information it is time for you to go out and decide what time of edging you want to put in and how you want to install it. No matter what type of edging it will definitely set your house out from others. So just make sure that you plan accordingly, and any type of edging can be done as a do-it-yourself project.

Dustin,
It is easy to see from your website that you are very knowledgeable on each of your topics. The layout flows well and gives the reader a detailed map to complete the projects. The Landscape Edging post looks great as is. I would suggest using relevant images as you have in the edging post on your home page and in the other posts. Images can make the post more readable.
Keep up the good work and I’ll be looking for more do it yourself projects.
I’ve been a landscaping estimator for 10 years. I read every line; I can tell you are very knowledgeable about your topic. When I read, I understand precisely what it is.
I love it. As a landscaping estimator, I can say that you are a professional.